Ceramic Coating
Wet Sanding vs Machine Polishing Guide
Blackout Team· Window Tinting Experts
·7 min read
Understand the difference between wet sanding and machine polishing for paint correction. Learn when each technique is appropriate and what results to expect.
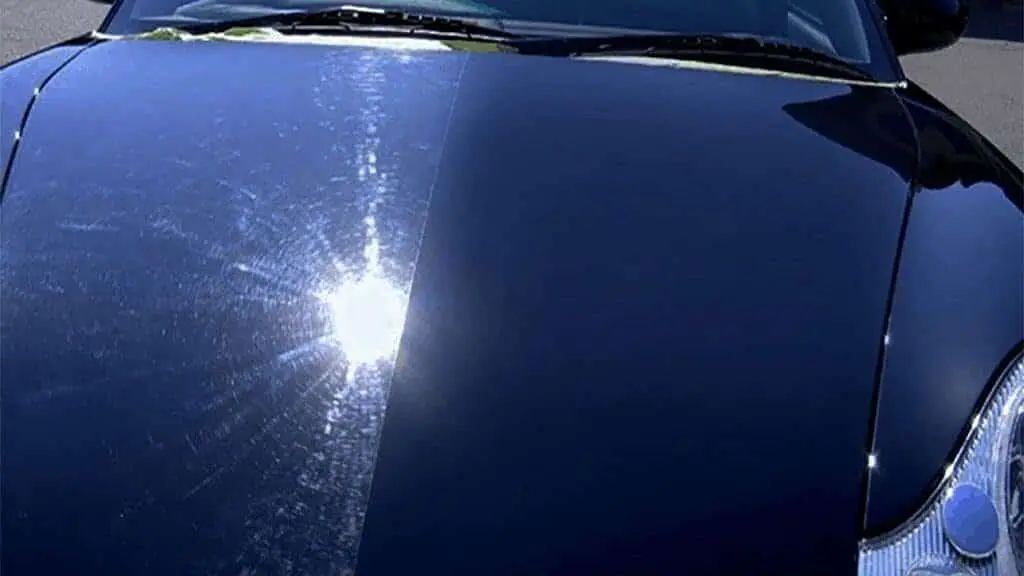
Most paint correction happens with machine polishers—dual-action or rotary tools spinning pads with various compounds to remove defects. But some paint problems are too deep or too textured for polishing alone. That's when wet sanding enters the picture.
Machine Polishing vs Wet Sanding: The Basics
Machine polishing uses abrasive compounds on spinning pads to level the clear coat and remove defects. It's the standard approach for swirl marks, light scratches, water spots, and general paint refinement.
Wet sanding uses abrasive paper saturated with water to aggressively level the paint surface. It removes much more material than polishing and addresses defects that polishing cannot.
Quick Comparison
| Aspect | Machine Polishing | Wet Sanding |
|---|---|---|
| Material removal | 1-5 microns per pass | 5-15+ microns per pass |
| Defect depth | Surface-level | Deep scratches, texture |
| Risk level | Low with proper technique | High—easy to burn through |
| Recovery time | Typically same-day | Multi-day for correction |
| Who should do it | Professional recommended | Professional only |
When Machine Polishing Is Enough
Most vehicles need only machine polishing. Common correctable defects:
Light to Moderate Swirl Marks
The circular scratch patterns from improper washing or automatic car washes. Standard two-stage correction (cut + polish) removes these completely.
Water Spots (Non-etched)
Mineral deposits sitting on the surface. Chemical treatment and light polishing often resolve these.
Light Scratches
Surface scratches that don't catch your fingernail. One or two polishing passes level these out.
Oxidation (Early Stage)
Hazy, dull appearance from UV exposure. Cutting compound removes the oxidized layer, polish restores gloss.
Buffer Trails/Holograms
Ghost-like marks from improper rotary use. Fine finishing polish removes these.
When Wet Sanding Is Necessary
Wet sanding becomes necessary when defects extend deeper than machine polishing can safely reach:
Deep Scratches
The test: If a scratch catches your fingernail, it may be too deep for polishing alone.
Polishing works by leveling the surrounding clear coat down to the scratch depth. Deep scratches require removing too much material—you'd burn through the clear coat trying to polish them out.
Wet sanding removes material more efficiently, allowing us to level to the scratch depth without excessive heat or polish cycles.
Severe Orange Peel
What it is: Textured paint surface resembling orange skin.
Orange peel exists in the paint itself—not on the surface. Machine polishing can reduce its appearance slightly, but true orange peel correction requires leveling the texture through wet sanding.
Heavy Paint Runs or Sags
Common on: Repainted panels, body shop work, touch-up paint
Paint that runs or sags creates uneven surfaces. Polishing can't level significant height differences—wet sanding cuts the high spots down before polishing smooth.
Factory Defects
Examples: Dust inclusions, fish eyes, crater marks
Some factory imperfections create actual raised or recessed areas in the paint. These require leveling that only wet sanding provides.
Severe Clear Coat Damage
When applicable: If clear coat is salvageable but heavily damaged
In cases where damage is severe but short of repaint-worthy, wet sanding may reduce defects that polishing cannot address. This is case-by-case and requires professional assessment.
The Wet Sanding Process
Here's exactly how professional wet sanding works:
Step 1: Assessment and Measurement
- Measure paint thickness at multiple points
- Calculate how much material can safely be removed
- Determine appropriate sandpaper grit starting point
- Plan progression through finer grits
Step 2: Surface Preparation
- Thorough wash and decontamination
- Mask off surrounding trim, rubber, glass
- Create wet working environment (spray bottle ready)
Step 3: Wet Sanding
- Start with coarsest grit needed (typically 1500-3000)
- Keep surface constantly lubricated with water
- Use flat sanding block for even pressure
- Work small areas systematically
- Frequently wipe and inspect progress
Step 4: Progressive Refinement
- Move to finer grits (2000, 2500, 3000)
- Each grit removes scratches from previous
- Continue until surface is uniformly hazy
Step 5: Machine Polishing
After wet sanding, the surface is uniformly hazed—not shiny. Multiple polishing stages restore gloss:
- Heavy cutting compound to remove sanding marks
- Medium polish for refinement
- Fine polish for final gloss
- Possible jeweling for show-level finish
Step 6: Inspection and Protection
- Multi-light inspection
- Paint thickness re-measurement
- Ceramic coating application
Orange Peel Correction: Is It Worth It?
Orange peel is the most common reason customers ask about wet sanding. Here's our honest assessment:
What to Expect
- Wet sanding can reduce or eliminate orange peel
- Creates super-smooth, glass-like finish
- Removes 10-20+ microns of clear coat
- Leaves less margin for future correction
When It Makes Sense
- Show cars where reflection quality matters
- New vehicles with thick, healthy clear coat
- Specific panels with excessive texture
- Customer prioritizes mirror finish over everything
When to Skip It
- Older vehicles with unknown paint history
- Thin or compromised clear coat
- Budget constraints (adds significant cost)
- Customer satisfied with improved-but-not-perfect results
The Math
Factory clear coat is typically 50-80 microns. Wet sanding for orange peel might remove 15-25 microns. That leaves 35-55 microns—still adequate, but less margin for future work.
Risks of Wet Sanding
Wet sanding is not a casual technique. Risks include:
Burn-Through
Remove too much material and you'll expose the base coat. There's no coming back from this without repainting.
Uneven Leveling
Poor technique creates waves, valleys, or uneven spots that may look worse than the original defect.
Missed Spots
Inconsistent coverage leaves obvious textured areas next to smooth sections.
Edge Damage
Edges and body lines have thinner paint—easy to sand through if not careful.
Requirement for Proper Finish
Wet sanding MUST be followed by proper machine polishing. Stopping at sanded finish leaves a hazy, scratched appearance.
This is why wet sanding should always be performed by experienced professionals.
Pricing for Wet Sanding Services
| Service | Description | Investment |
|---|---|---|
| Deep scratch removal | Targeted panel wet sanding + polish | $200-400/panel |
| Orange peel reduction | Full vehicle wet sanding + multi-stage polish | $1,500-3,000 |
| Paint correction + wet sanding | Combined service for severe defects | $2,000-4,000 |
Pricing varies by vehicle size, paint condition, and extent of work needed.
Case Studies
Case 1: Deep Key Scratch
Vehicle: 2022 Porsche Cayenne Problem: Vandalism scratch across door, caught fingernail Solution: Localized wet sanding (2000 grit) + polish Result: 95% improvement, barely visible in certain light Alternative: Respray ($800+)
Case 2: Severe Orange Peel
Vehicle: 2023 BMW M4 (new) Problem: Excessive factory orange peel on hood and roof Solution: 3000-grit wet sanding + 3-stage polish + coating Result: Glass-smooth finish, mirror reflections Investment: $2,800 for hood, roof, and trunk
Case 3: Failed Body Shop Respray
Vehicle: 2019 Honda Accord Problem: Orange peel, runs, and dust in repaired fender Solution: Extensive wet sanding + leveling polish Result: Matched factory panels, invisible repair Alternative: Strip and respray ($1,500+)
When to Choose Each Option
Choose Machine Polishing When:
- Swirl marks and light scratches are the main concern
- Paint texture is acceptable
- Budget is primary consideration
- Vehicle will receive regular maintenance
Choose Wet Sanding When:
- Deep scratches that catch fingernail
- Orange peel correction is specifically desired
- Show-car level finish required
- Repainting would be the only alternative
Choose Respray When:
- Clear coat is failing or peeling
- Paint is too thin for safe correction
- Damage extends to base coat or primer
- Correction cost approaches respray cost
Book Your Paint Assessment
Unsure which approach your vehicle needs? Our Gilroy shop provides free paint assessments under professional lighting. We'll measure your paint, evaluate defects, and recommend the most effective approach.
📍 Location: Gilroy, CA (just off Hwy 101) 📞 Call: 408-848-8468 📧 Email: [email protected]
Frequently Asked Questions
Can I wet sand my own car?
Technically possible, but highly inadvisable. The risk of burn-through, uneven leveling, and poor finishing is high without professional equipment and experience. The cost of correcting DIY wet sanding mistakes often exceeds professional correction pricing.
Does wet sanding damage paint?
Wet sanding removes paint material—that's the point. It's not "damage" when performed correctly with adequate material to spare. It becomes damage when someone removes too much or works improperly. Professional assessment and technique are essential.
Will wet sanding void my warranty?
Wet sanding is a cosmetic procedure that doesn't affect mechanical warranties. However, improper wet sanding that damages paint might create claims issues for paint-related warranty coverage. Professional work doesn't cause these problems.
How smooth can paint get with wet sanding?
Extremely smooth—smoother than any factory finish. Professional wet sanding + polishing can achieve a "liquid" appearance with perfectly smooth reflections. This is the standard for show cars and concours-level detailing.
What grit sandpaper is used on cars?
Automotive wet sanding typically uses 1500-3000 grit, far finer than wood or metal sanding. We never go coarser than 1500, and often work entirely in 2000-3000 range for final corrections. Each grit leaves scratches that the next finer grit removes.
Related Articles
- Ceramic Coating Cost 2026 Bay Area Guide
- Ceramic Coating Maintenance Mistakes
- Ceramic Coating Preserve Shine
31+ years
The team at Blackout Window Tinting has been serving the Bay Area since 1993, providing premium window tinting and vehicle protection services.
Window TintingPPFCeramic CoatingVehicle Wraps

