Spring Detailing: Your Post-Winter Refresh Checklist
The ideal spring detailing sequence is decontamination first, then paint correction if needed, then protection—never protect over contamination or defects. This order ensures you're not sealing in damage and that your investment in coating or sealant actually lasts.
Winter is over. The rain's stopped. You walk out to your car and examine it for the first time in months.
It's rough.
Water spots. Grime lines. That mysterious film on everything. Your car survived winter, but it didn't thrive.
Here's how to bring it back—and protect it for the warm months ahead.
The Winter Damage Assessment
What to Look For: Complete Checklist
Walk around your car and assess each area systematically:
Paint Surface Inspection:
| Contaminant | Appearance | Source | Removal Difficulty |
|-------------|------------|--------|-------------------|
| Water spots | White/etched marks | Rain minerals, sprinklers | Easy to severe |
| Rail dust | Orange/brown specks | Industrial fallout | Moderate |
| Tar spots | Black raised dots | Road tar spray | Easy with products |
| Tree sap | Sticky amber residue | Parking under trees | Moderate |
| Oxidation | Dull, chalky areas | UV damage through clouds | Professional needed |
| Swirl marks | Spider-web patterns | Poor winter washes | Professional needed |
Glass Inspection:
- Film from deteriorating wiper blades
- Hard water spotting (white haze)
- Wiper streak damage lines
- Pitting from debris impacts
- Salt or mineral deposits
Wheel Inspection:
- Heavy brake dust buildup (brown/black)
- Tar from road spray (black specks)
- Rim scratches from pothole impacts
- Curb rash from winter visibility issues
- Clear coat peeling on wheel surfaces
Interior Inspection:
- Musty smell (moisture/mold growth)
- Salt residue on carpet edges
- Dashboard dust film
- Sticky residue on surfaces
- Floor mat saturation
- Leather dryness or cracking
The Spring Refresh Process
Level 1: Basic Wash Won't Cut It
If you only wash and dry after winter, you're moving contamination around—not removing it. Spring refresh requires a specific order of operations.
Why order matters:
- Washing contaminated paint without decon → scratches from dragging particles
- Coating over bonded contamination → seals it in permanently
- Correcting before decontamination → risks scratching from remaining particles
Start with these decontamination steps:
Step 1: Pre-Rinse and Foam
- Pressure wash all loose debris
- Focus heavily on wheel wells and lower panels
- Don't touch paint yet—let water do initial work
- Apply foam cannon or thick suds, let dwell 5-10 minutes
- Rinse without touching
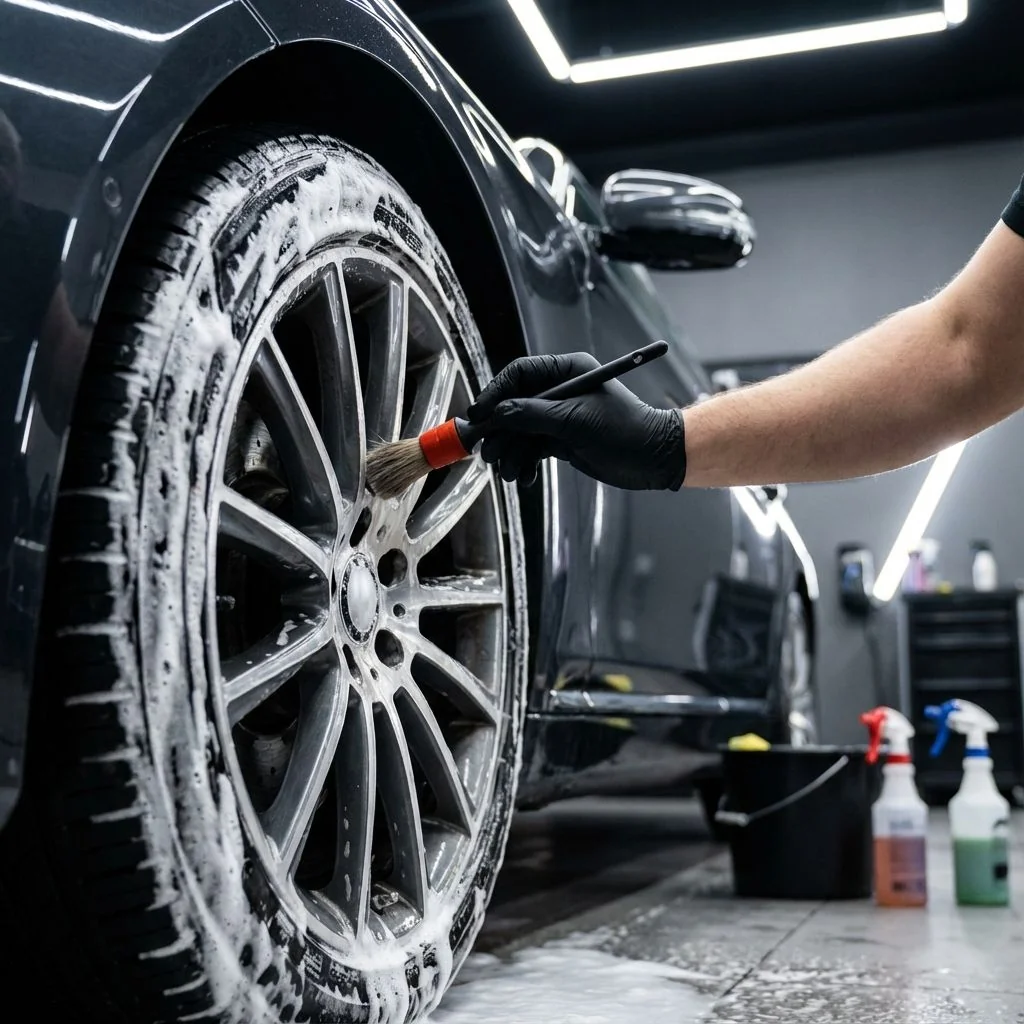
Step 2: Mechanical Wash (Two-Bucket Method)
- Grit guard in rinse bucket essential
- Wash mitt only—never sponges
- Work from top down
- Rinse mitt after every panel
- Fresh rinse before moving sections
Step 3: Chemical Decontamination
- Iron remover spray: Turns purple on contact with embedded iron particles. Leave 3-5 minutes, rinse thoroughly.
- Tar remover: Apply to black spots with microfiber, let soften, wipe away gently.
- Tree sap remover: Apply, wait for softening, don't scrub aggressively.
- Rinse each product completely before next step
Step 4: Clay Bar Treatment
- Use clay lubricant generously
- Work in 12" sections
- Knead clay frequently to expose clean surface
- Paint should feel glass-smooth after claying
- This is essential before any coating or wax
Level 2: Correction for Winter Damage
After decontamination, run your hand over the paint. If you feel roughness, see swirls, or notice etching, correction is needed before protection.
Clay bar reveals paint condition:
- Swirl marks from winter car wash visits
- Scratches from debris contact
- Water spot etching (permanent in severe cases)
- Oxidation from UV/acid rain exposure
Paint correction levels explained:
| Level | Defects Addressed | Time | Investment |
|-------|-------------------|------|------------|
| Single stage | Light swirls, minor defects | 4-6 hours | $250-400 |
| Two stage | Moderate swirls, scratches | 8-12 hours | $400-700 |
| Multi-stage | Heavy damage, deep scratches | 12-20 hours | $700-1,200 |
| Wet sand + correct | Severe etching, orange peel | 2-3 days | $1,200-2,000 |
Why correct before protecting: Any coating applied over defects locks them in, making them visible through the coating. Spring reset is your chance to start fresh.
Level 3: Protection for Warm Months
After decontamination and correction, your paint is ready for protection. Choose based on your commitment level:
Option A: Wax/Sealant (Temporary)
- 2-4 month protection duration
- Easy application (DIY-friendly)
- Requires reapplication before summer ends
- Good for budget-conscious drivers
- Provides basic UV protection
Option B: Ceramic Coating (Permanent)
- 2-5 year protection depending on grade
- Professional application recommended
- No reapplication needed
- Summer heat resistant
- Superior UV and contaminant protection
Our recommendation: If you've gone through full decontamination and correction (or paid for it), ceramic coating makes the investment last. Otherwise, you'll need to repeat correction again in 1-2 years.
Interior Spring Refresh
The Deep Clean Process
Winter takes a toll on interiors too. Here's the complete refresh approach:
Vacuuming (Thorough, Not Quick):
- Remove all floor mats (front and rear)
- Vacuum under seats (most neglected area)
- Crevice tool for gaps between seats and console
- Door pockets and storage compartments
- Trunk/cargo area completely
- Under and around seat rails
Hard Surface Cleaning:
- All-purpose cleaner diluted appropriately for each surface
- Dashboard cleaning with UV protectant
- Console and door panels
- Vent cleaning (use detailing brushes)
- Cup holders (often neglected, bacteria breeding)
- Steering wheel and shifter (high-touch areas)
Upholstery Deep Clean:
| Material | Cleaning Method | Frequency |
|----------|-----------------|-----------|
| Cloth seats | Hot water extraction | Annually |
| Leather seats | Leather cleaner + conditioner | Bi-annually |
| Vinyl seats | All-purpose cleaner + UV protectant | Annually |
| Carpet | Hot water extraction or shampooing | Annually |
| Rubber mats | Degreaser + scrub + dress | As needed |
Interior Protection for Summer
After deep cleaning, apply protection to prevent summer damage:
Leather Care:
- Conditioning restores moisture lost during winter
- UV protection prevents cracking from summer sun
- Ceramic interior coating prevents staining and simplifies cleaning
Fabric Protection:
- Fabric protector spray repels spills and stains
- Essential for families with kids
- Reduces summer staining from sweat and sunscreen
Dashboard and Trim:
- UV protectant prevents fading and cracking
- Matte finish products prevent glare while driving
- Ceramic interior coating for long-term protection
Complete Spring Package Options
Basic Spring Refresh
- Full exterior decontamination
- Clay bar treatment on all painted surfaces
- Interior vacuum and wipe-down
- Tire and wheel cleaning + dressing
- Protective sealant application
Time required: 3-4 hours
Investment: $200-350
Best for: Well-maintained vehicles needing seasonal refresh
Correction + Protection Package
- Everything in Basic package
- Paint correction (single or two-stage as needed)
- Ceramic coating application
- Glass coating on all windows
- Interior deep clean with extraction
Time required: 1-2 days
Investment: $700-1,500
Best for: Vehicles with visible defects needing comprehensive restoration
Premium Spring Reset
- Full multi-stage paint correction
- Premium ceramic coating (3-5 year)
- Glass ceramic treatment (all surfaces)
- Wheel ceramic coating
- Interior leather/fabric protection
- Headlight restoration with coating
- Engine bay cleaning
Time required: 2-3 days
Investment: $1,500-2,500
Best for: High-value vehicles or owners wanting maximum protection
Why Spring is Optimal Timing
Weather Conditions
Spring advantages:
- Moderate temperatures (ideal for coating cure: 60-80°F)
- Lower humidity than summer (better bonding)
- Minimal dust compared to dry summer months
- Sufficient daylight for thorough inspection
Damage State
Timing matters for correction:
- Winter contamination hasn't permanently bonded (easier removal)
- Water spots haven't etched beyond repair
- Oxidation hasn't penetrated fully yet
- Paint is still correctable without more aggressive methods
Summer Readiness
Get protection before you need it:
- UV blocking active before intense summer sun
- Coating cured and hardened before heat stress
- Paint protected for road trip season
- Interior ready for summer passengers
Best Spring Window
March 15 - May 15 in Bay Area offers:
- After last significant rain (usually)
- Before summer heat arrives (coating cure friendly)
- Before pollen season peaks (less contamination during cure)
- Before appointment books fill up (better scheduling)
DIY vs. Professional: Know the Line
DIY Works Well For:
- Basic wash and dry
- Interior vacuum and wipe-down
- Applying spray wax or quick detailer
- Weekly maintenance washes
- Floor mat cleaning
Professional Needed For:
- Chemical decontamination (requires proper products and technique)
- Clay bar treatment (improper technique causes scratches)
- Paint correction (requires machines, training, lighting)
- Ceramic coating (requires controlled environment, expertise)
- Hot water extraction (specialized equipment)
The reality: You can DIY about 60% of spring refresh effectively. The remaining 40% determines results that last versus damage that accelerates.
Common Spring Detailing Mistakes
Mistake 1: Rush Job Wash
Pressure washing immediately without pre-soak = grinding debris into paint.
Correct approach:
- Foam cannon or thick suds first
- Let dwell 5-10 minutes
- Rinse thoroughly
- THEN touch with wash mitt
Mistake 2: Coating Without Decontamination
Ceramic coating over contamination = sealed-in contamination visible through coating.
Correct approach:
- Always decontaminate fully first
- Clay bar until surface feels glass-smooth
- Correct any revealed defects
- Then apply coating
Mistake 3: Skipping Interior Completely
"I'll just do the exterior" leads to:
- Musty smell becoming permanent mold
- Salt residue damaging carpet fibers
- Dashboard UV damage accelerating
- Half-refreshed car feeling incomplete
Mistake 4: Cheap "Paint Correction"
$99 paint correction isn't correction—it's a glaze or filler that:
- Masks swirls temporarily (3-6 months)
- Washes away leaving original damage
- Wastes money that could save toward real correction
- Delays addressing actual problems
Real correction takes 4-20+ hours depending on severity because it's actually removing defects, not hiding them.
Mistake 5: Wrong Product Sequence
Applying protectants before thorough cleaning seals in:
- Dirt particles
- Old product buildup
- Contaminants that damage paint
- Odors and bacteria inside
Always: Clean completely → Correct if needed → THEN protect
Ready for Spring?
Your car survived winter. Now give it the reset it deserves—and the protection it needs for the warm months ahead:
📞 Call 408-848-8468 — ask about spring packages
📅 Schedule online — March-May appointments fill fast
📍 Visit 610 Holloway Rd — Gilroy, CA
Frequently Asked Questions
What's the difference between a spring detail and just washing my car?
A basic wash removes loose surface dirt. Spring detailing includes chemical decontamination to remove bonded iron particles, tar, and tree sap; clay bar treatment to create a perfectly smooth surface; and protective treatment that lasts months. The difference is comprehensive restoration vs. superficial cleaning—results you can feel when you run your hand over the paint.
How do I know if my car needs paint correction?
Check your paint under direct sunlight or use a flashlight in a garage. If you see spider-web swirl patterns, scratches, or haze, correction is needed. Run your hand over washed, dried paint—if it feels rough like sandpaper, you have bonded contaminants that clay will help and correction may be needed afterward.
Is spring the only good time for ceramic coating?
No, ceramic coating can be applied year-round with proper facilities. However, spring offers ideal conditions: moderate temperatures for cure, lower humidity than summer, and protection in place before UV-intensive summer months. Most professional shops can control environment for any-season application.
How long does spring detailing take?
Basic refresh: 3-4 hours (decontamination, clay, protection)
With correction: 1-2 days (depends on paint condition)
Premium reset: 2-3 days (full correction, ceramic coating, interior)
Plan accordingly—don't schedule detail the day before a trip.
Can I just use an automatic car wash after winter?
Not recommended. Brush car washes drag winter grit across your paint, causing scratches. Touchless washes are safer but use harsh chemicals that strip protection. After winter, your car needs proper decontamination—not just surface washing that moves contamination around.
What causes water spots, and can they be removed?
Water spots form when mineral-laden water evaporates, leaving mineral deposits. Light spots can be removed with proper water spot remover products. Etched spots (where minerals have eaten into clear coat) require polishing or correction. Prevent them with ceramic coating (water beads and sheets off) and by drying the vehicle after washing.
Should I correct paint before or after PPF installation?
Always correct before PPF. Paint Protection Film is transparent and will show any swirls, scratches, or defects underneath. Correcting paint under film is impossible—you'd have to remove the $2,000+ film, correct, and reinstall. Get paint perfect first, then protect it.
How often should I get professional detailing?
For most vehicles: twice annually (spring after winter, fall before winter) for comprehensive detailing. Monthly quick wash maintenance between. Ceramic-coated vehicles may stretch to annual professional maintenance since the coating prevents most contamination bonding.
Visit the Experts in Gilroy
Blackout Window Tinting is the Bay Area's premier choice for premium auto protection. Based in Gilroy at 610 Holloway Rd (behind Target), we've served the South County and Silicon Valley area for over 33 years. Whether you're coming from Morgan Hill, Hollister, or anywhere else in the Bay Area, we're your trusted local source for professional window tint, PPF, ceramic coating, and detailing.
📞 Questions? Call us at 408-848-8468 or get a free quote online.